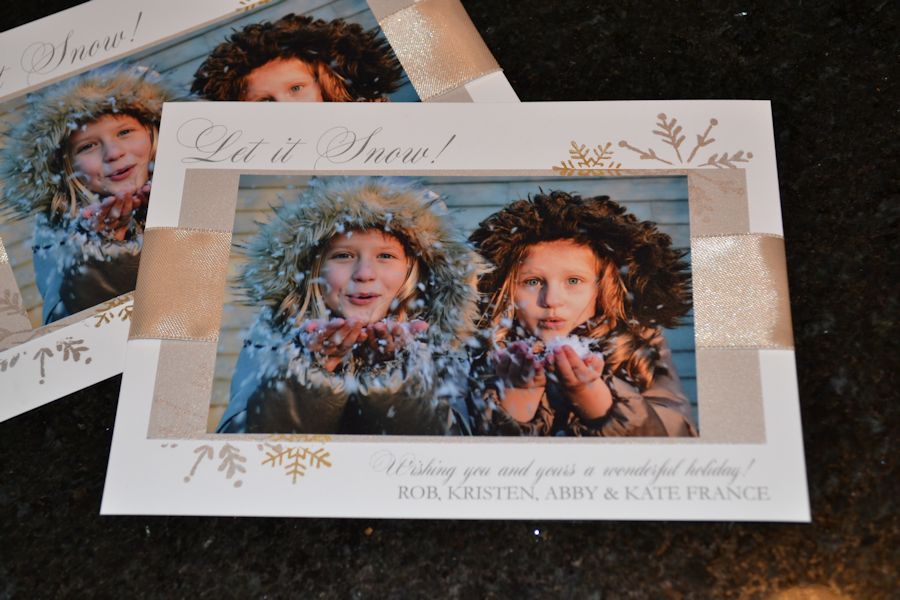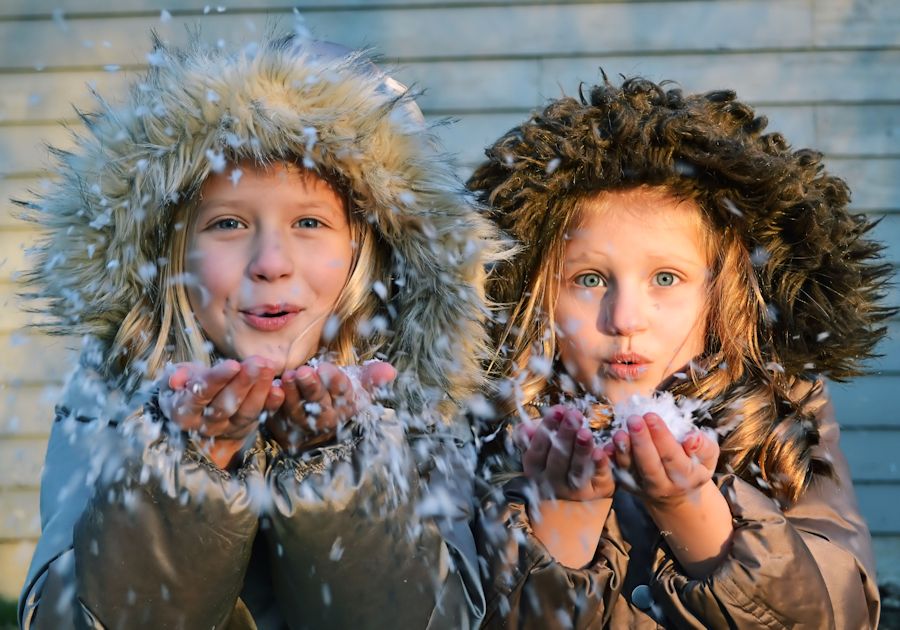
I got such a big response from everyone this year about our Christmas card and a bunch of family and friends asked how I make them. So I thought I would post a little how-to on the blog. I’ve made my own Christmas cards almost every year since Abby was born and have tried to incorporate a Christmas carol or a line from a Christmas book into the card. I decided to do “Let it Snow” this year when I saw a cute picture on Pinterest of a kid blowing snow at the camera. Abby’s winter coat went perfectly with my color scheme, but Kate’s current coat (dark pink) didn’t go so well with my silver, gold, and white idea. So I had her wear her coat from Kindergarten that I thankfully never got around to giving away. She was annoyed and wanted to wear her pretty pink coat, thankfully she finally obliged. I was concentrating so much on getting them to blow the snow at the same time that I didn’t even notice Kate’s sleeves weren’t long enough and her nail polish was a disaster. Hopefully none of you noticed either!
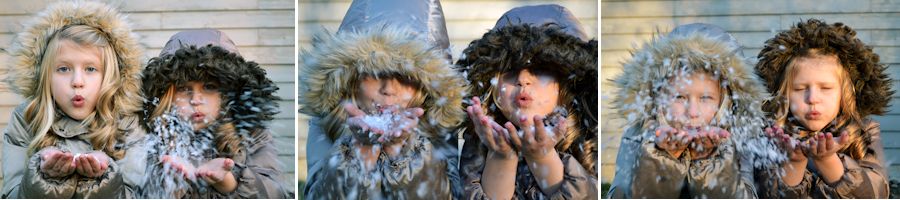
With a bag of fake snow from Amazon, I took the girls outside and had them stand behind the garage. We thought it would take just a few minutes to get the picture, but we were very wrong. Getting the girls to blow the snow at the same time proved to be a challenge, and when they did do it at the same time inevitably someone’s eyes would be closed or their hood would cover half their face. The girls were over it, but were happy to get candy and hot chocolate after an hour outside in the cold. I ended up with two pictures out of more than 100 that I loved and put it to a vote with some family and friends to help me pick which one to use for the card. Here are some of the ones that didn’t work.
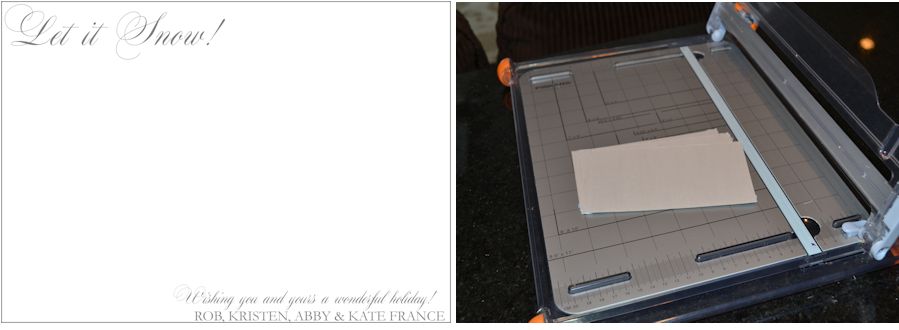
Sending the picture to get printed on matte 3.5 x 5 paper was easy. Matte makes the photo look more professional and it doesn’t show any fingerprints so I don’t have to be that careful with them. While I usually have to order them online, a new shop called Foto Houze opened up near our house in Downers Grove this fall so I tried them. They printed 125 copies for me in less than an hour- they couldn’t have been better…I’m definitely using them again. Ultimately I ended up cutting the pictures down to 3 1/8 x 5 to get the look I wanted. The background for the 5 x 7 cardstock was done on my photo software and I emailed it to Maximum Printing. They’re also here in Downers and are awesome-they printed them all the same day. I got some silver paper from Hobby Lobby and cut them to 6 x 3.5 with my paper cutter.
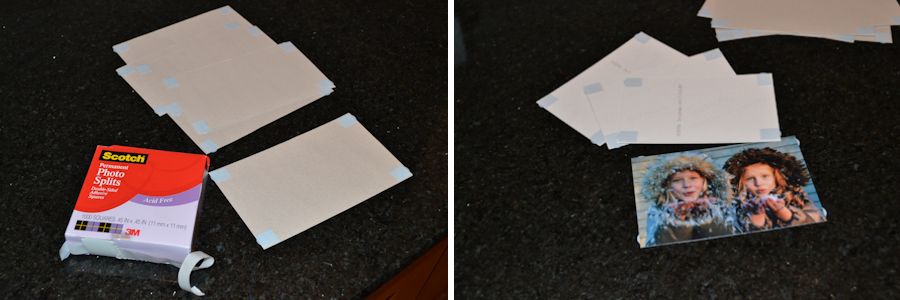
I added photo stickers to the corners of the silver paper and the pictures. It’s pretty easy to find photo stickers at office supply and craft stores, however sometimes they are labeled as photo splits. I found these Scotch Photo Splits at Memories & Beyond Scrapbook Store in Downers..
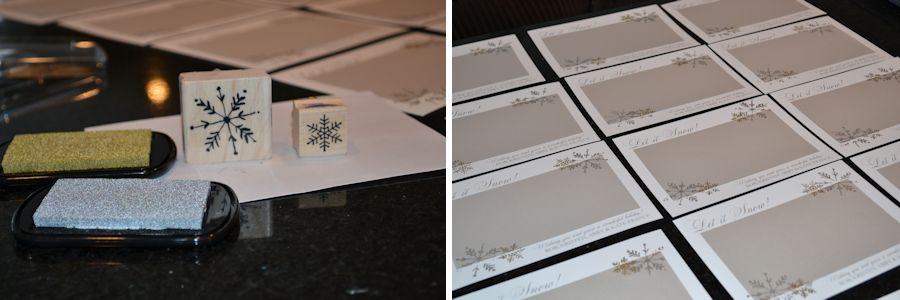
Originally I added the picture on top of the silver paper, but felt like it was missing something. So I ran up to Hobby Lobby and grabbed a couple of snowflake stamps as well as silver and gold ink. Then I layered the gold snowflake over the silver one to add depth.
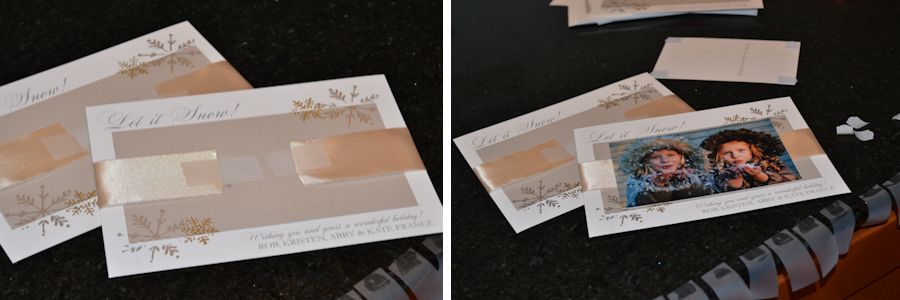
Next I cut one inch gold ribbon into 12 inch strips, taped them to the card and then put the picture on top. No need for double sided, I just used double sided tape for this.
Normally I would print out the addresses on an envelope using the same fonts as the card, but my printer decided it enjoyed eating envelopes this year, so I had to hand write them. Other than that, I’m pretty happy with how it turned out. Now that the kids are getting bigger I’m having a hard time coming up with ideas that they won’t be embarrassed about in the years to come!